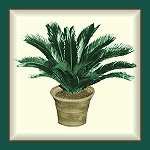

| Our field of 25 year old Sago palms constantly produce offshoots, also
called "pups". Some such as the one above produce them low near the
ground, while others produce them up and down the sides of the trunk.
Pups are a wonderful source of new plants (the other being seed) and we harvest them each year in late winter and early spring when Sagos are dormant and before they start getting their new summer leaves. Many are barely attached to "moma" and can be easily popped off, whereas
others can be embedded and take a little more effort to remove. We
use hand trowels for the small ones and a sharp shooter shovel to help
cut and dig large pups such as the one below.
 We always remove leaves from pups since they do not yet have roots and will no longer have mom supporting them. If the pup does have a few roots, we take those off too. (Don't worry, they will grow new leaves and roots in a few months as they start living on their own!) Pups are cleaned in a tub of water, then set aside for a week or so to "harden off" and allow the cut to dry. If kept in a cool, dry place, they can be "stored" for a few months. 
Once in a while, we find unusual pups - "Siamese twins" and even "triple heads" such as this one. They can grow into very unique specimens and are also wonderful for Bonsai. This one had some roots when taken from the mother plant, but they will be removed since they would dry and die during the "hardening off" stage. After we've harvested pups and allowed them to "harden off", we sort them into sizes. A well drained soil is prepared - half perlite and half peat-moss is a good mixture or course river sand with some peat-moss, then we "size them" to pots. One of the most important steps in rooting Sago pups is to match the size of the pup to a pot only slightly larger. For example if the pup bulb is 2" in diameter, we'll use a 4" pot. It won't need much room or soil at first until it grows new roots... and the small pot size keeps it from staying too wet in an oversized container with far too much soil. In the picture below, we have 2", 3", and 4" pups
and have selected a 4", a 5", and a 6" pot for them.
Fill the pot with soil and water well. Then set the pup on top and push down until half the bulb is set into the soil. If you plant it too deep with only its "nose" showing, it may rot; if you plant it too shallow, then roots may not have enough surface to develop. Second most important thing is proper watering. Allow the soil to become almost dry before watering again - do not keep it continuously wet or the bulb might rot before it roots. It won't have roots for a few months, yet you do not want the bulb to be constantly dry. Once it starts growing roots, you will notice! It will suddenly need watering more often. (and you may start seeing roots creeping out of drain holes). We water thoroughly slowly adding water around the top of the soil, and usually water twice - the first time wets the soil, the second watering a few minutes later soaks the soil. If you are starting new pups in spring or early
summer (the best time to do that), then you will probably see leaves emurge
within a few months. It will start putting out new roots at the same
time.
 How many leaves? Generally small pups may put out only one or two first leaves, whereas larger pups can put out three or more. Do not fertilize a pup until it has grown the first set of leaves and a good set of roots. Eventually, new pups will become root-bound (because you started with
a small pot, remember) .... and it will be time to move it to a larger
container. Move it up to the next size pot, but never overpot a Sago,
they will grow faster if you keep them in pots only slightly larger than
the root system. Here is a 6" pot like the one shown on the right
above that was ready to move up to an 8" pot and grew its second set of
leaves - beautiful aren't they?
  Whether you grow small or large pups, the experience can be quite fun! |

