
| SO ... you've had a nice pretty Sago Palm in
your yard for years, and suddenly, one spring, it has a very weird "thing"
growing in the middle of it! What's happening? It's Mother
Nature's way of producing more of these beauties, however, Sagos are like
people... reproduction takes two - a male and a female.
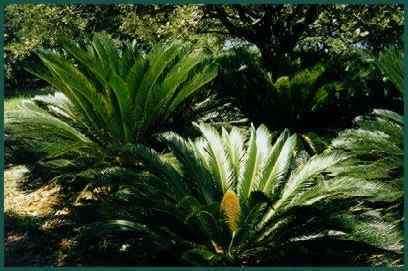
In late spring, a mature male Sago produces a golden cone, shaped like a giant pine cone which may grow over 2' tall as shown in the photo above. A female, shown below, produces a huge golden flower which slowly opens when it is fertile, then closes, and begins to produce viable seed if pollination from a male sago was successful. 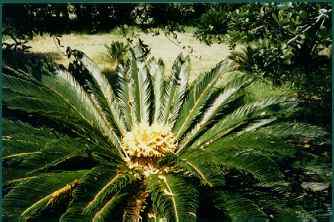 Do mature sagos flower every year? No, it usually only happens every second or third year, otherwise, they produce a new set of spring leaves, as usual. How can you tell if a Sago is male or female when it is young, or in a 6" - 17" (15 - 40 cm) pot at the Garden Center? You can't. Most Sagos must be at least 15 -20 years old before they are mature enough to bloom, and they also must be well established in your garden or landscape. I've never seen one bloom in a pot. How big is a 15 year old? BIG! Usually they will have an 10" - 14" (30 cm) diameter trunk and a leaf spread of 5' - 6' (2 m). In their native habit, Cycads are pollinated by wind or insects, however, in cultivation, they usually must be hand-pollinated for viable seed production. In my South Texas greenhouse operation, 100 mature male and female Cycas revoluta - over 25 years old - are ground-planted as seed "parents". Each year, about 30 males and females bloom and can produce more than 7,000 seed. You don't need a greenhouse operation to experience the fun of growing Sagos from seed, all you need is a male and female in your yard. Or if you have one, perhaps a neighbor or friend has the other! In the Northern Hemisphere, Cycas revoluta ("King
Sago Palms") begin to flower at the end of May. Gary, our sago palm
grower, and I check the blooming plants daily to determine when each is
ready for pollination - timing can be somewhat critical. The female
flower will open when it is ready to receive pollen, and the male cone's
"scales" will open to reveal pollen and have a sweet perfume odor.
At that point, we snap (or saw) the male cone from the center of the plant
and shake it over the female. A cone has plenty of pollen and can
be used on several females at a time, or on one several days in a row.
The process is shown below:
Male cones will stay viable for a few days if kept in a cool place. Store in a plastic bag when you are not using them to pollinate females. Be aware though, that they can turn from smelling quite wonderful and sweet into something quite rancid and awful when they are "passed their prime"! [Note: If you don't plan to use your male cone for pollination, then
it can be removed, even when first starting to grow, without any ill effects
to your sago palm. There's no way to remove the female, but then
the flower is rather pretty. Usually they will not grow new leaves
until the fall or following spring.]
Rarely, a male sago will have several heads which can sprout multiple cones as shown above. This one is in Valdosta, Georgia and the photo is used with permission from Dr. Mink, a chiropractor. Seed slowly develop during the summer, become walnut-size, turn from yellow to bright orange in the winter, and are ready to be removed from the "moma" Sago in January through March of the following year. Seed that are ready to harvest will easily pull off the plant and be about the size of a walnut. 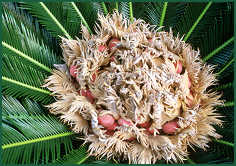 If a seed is tiny or floats when placed in water, then it wasn't pollinated and won't sprout. Remove the orange skin by soaking in a bucket of water for a few days (change the water every day), then peel off the skin. Use gloves, otherwise your hands might turn orange! Once the seed has been cleaned and allowed to dry a day or two, you are ready to plant them. (If the skin just won't come off, then you probably didn't leave them on the moma plant long enough to dry the seedcoat. Just plant them skin on). Choose a shady, protected area to sprout your seed since "first leaves" can be tender. If you don't plan to plant the seed right away, store in a cool, dry place. Before planting, soak in a bucket of water for a day to remoisturize the hard ivory seed coat. Seed can be stored for up to several months. Fill flats or soil benches (they need to be about 5-6" or 12-15 cm deep) with well drained soil - you want the water to "perk" through fairly fast - and press the seeds 2/3 of the way into the soil so that only the top flat side can be seen. We use 50% perlite and 50% peat moss to root ours or course river sand. 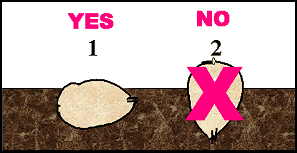 Water well, press the seeds down again if some "bubble" up and water again. Use a "water breaker" - something that provides a gentle "rain", not a blast of water. Note: I've had lots of emails asking which end of the seed to plant.
You plant sago seeds on their side. To demonstrate this, take a handful,
drop them on a soft floor and watch how they fall -- they fall on
their sides just like if they fell out of a mother plant in the forest.
Only the top flat side of the seed should peek out of the soil. Mother
Nature usually covers them with falling leaves and natural mulch, but we'll
have to improvise with a little extra soil almost covering them.
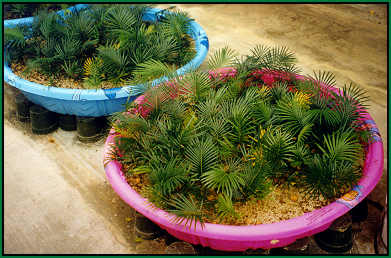 If you don't have lots of space to sprout your seed in pots or beds, then buy inexpensive plastic children's wading pools, drill 1/2" holes in the bottom, line with newspaper, fill at least 6" (15 cm) deep with good quality well drained potting soil, and plant your seed in rows about 1" - 2" apart. About 250 should fit in a small pool. We raise our pools on upside down pots to allow good drainage and air circulation. You may have to put screen wire over the pool and seeds to keep garden critters from helping themselves to your Sago stash!
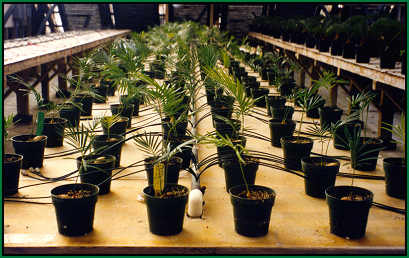 When all the seed in a pool, bed, or tray seem to have come up that will, then plant them in 4" pots only slightly larger than the root system. Spiral the long roots down into the pot and add soil. Do not cover the growing tip of the young sago. Adjust the soil level so that only the uppermost tip of the seedling shows.
Seedlings prefer to be root bound at first, but within 6 to 8 months, should be ready to transplant to the next size container; we use 5" pots. By the 2nd year, most become root bound and can be moved up to a 6" or 1 gallon pot. 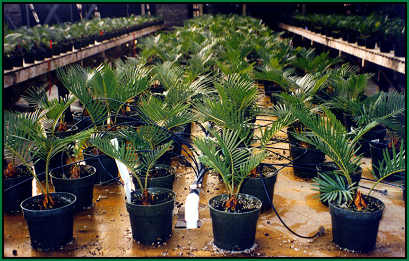 By the 3rd year, Cycas revoluta are ready to be transplanted to larger pots or planted in your landscape. Once in a while, your seedlings might give you a real surprise such as the one below - a white leafed specimen! While we have a few green and white striped Cycas revoluta plants, we have yet to sprout one from a seed, but then one never knows what might result from the next crop. 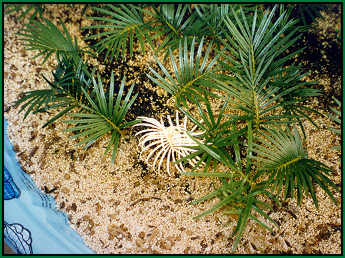 Seedling Sagos are popular plants for terrariums, garden party favors, fund raisers, and we even had one customer, planning a huge banquet event, put one at each place setting to create a tropical palm theme. Growing Sago Palms from seed can be quite fun! |
|||||||||||||||||
| Copyright (C) 1997-2002 Lynn McKamey; Rhapis Gardens, P.O.B. 287, Gregory, Texas 78359 Photographs by Lynn McKamey. |

